
Handwriting OCR Form Processing
A Step-by-Step Walkthrough
UPDATED: Jul 7, 2025
Step 1: Creating a template
Before getting started on processing forms, it is necessary to generate a template that indicates which data fields to convert, their location, and their label.
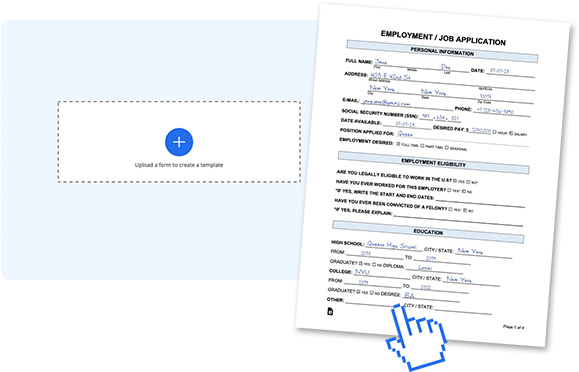
1
Start a new template by uploading a scan of a filled-out form (not a blank one). Choose a scan with as many filled fields as possible, to help the system identify the locations of active fields.
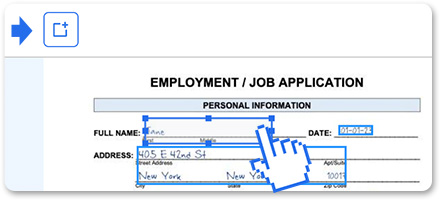
2
Pen to Print identifies the data fields and highlights them on the scanned document. The form is then displayed with the highlighted data fields on one side and in a table of corresponding keys and values on the other.

3
Easily add new data fields using the button on the top. Drag and drop it to the desired location on the form.
New cells will be added at the bottom of the table, and can be deleted there.
4
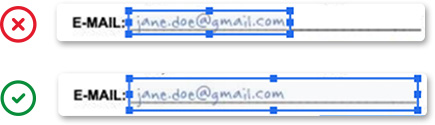
Adjust the size of the data field on the form to encompass the complete cell or line, taking into consideration that responses on various forms may be situated anywhere within the cell or line.
5
On the table, you can easily reorder, rename and delete data fields, allowing you to customize the template according to your requirements.
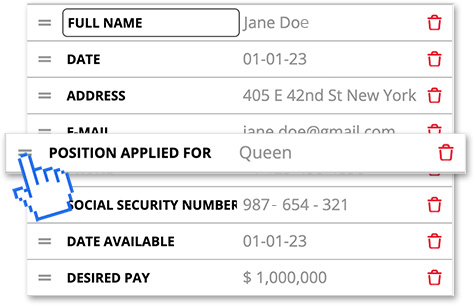
6
When you're done, save your template with a descriptive name.

Step 2: Batch form processing
Now that the template is set, it's time to process the forms.
1
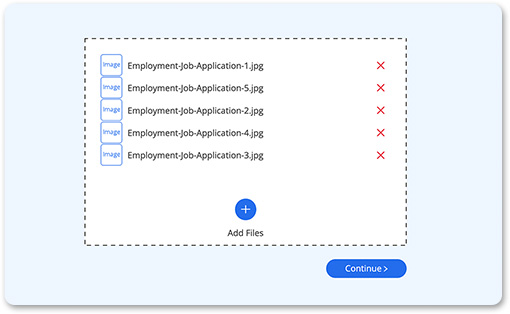
Choose the desired template, and upload the scanned forms you wish to process (up to 50 pages per session).
2
View the scan and the extracted values, side by side, browse through the various copies of the form, and make changes and corrections, if needed.
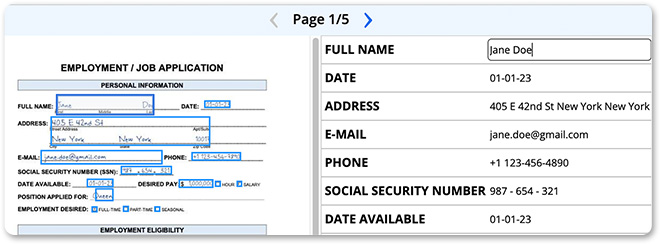
At this stage, you can only alter the values for each form and not the data fields or the keys in the table.
Step 3: Exporting
1
Select an export format, either a document or a sheet, and choose the file format, such as Word or text for a document and Excel or csv for a sheet.

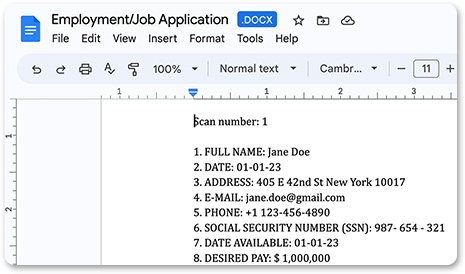
A document file (Word or txt) saves the extracted data as a list, with one form listed after another.
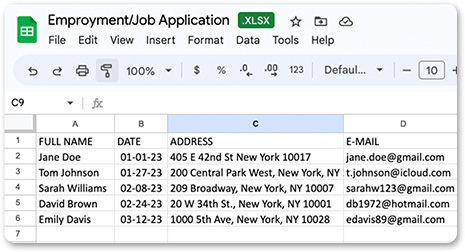
A sheet file (Excel or csv) saves the extracted data as a table, with each line representing a form and each key is assigned to its corresponding value.
Once the forms are processed and exported, exporting to additional formats is free.
2
Save the file on your device or cloud service.
Have any questions?
Check out our Frequently Asked Questions or Contact Us for further assistance.